Decoupage Decoupage - Your Crafty Guide
Table of Contents
- What is Decoupage Decoupage Anyway?
- Getting Started with Decoupage Decoupage - What You Need
- How Do You Actually Do Decoupage Decoupage?
- Simple Steps for Your First Decoupage Decoupage Project
- Is Mod Podge the Only Way for Decoupage Decoupage?
- Different Kinds of Decoupage Decoupage Mediums
- Why Do Wrinkles Happen in Decoupage Decoupage?
- Fixing Common Decoupage Decoupage Glitches
- Beyond Flat Surfaces - Exploring Decoupage Decoupage Styles
- Pyramid Decoupage Decoupage - Adding Depth
Have you ever looked at something ordinary around your place and wished it could have a little more sparkle, a bit more of your own personality? Well, there's a simple, really fun way to give everyday objects a fresh look, turning them into unique bits of art. It’s all about sticking down bits of paper or cloth onto a surface, then making them look like they belong there, sealed in for good.
This creative process, which some folks call decoupage, lets you take plain things and make them special, quite honestly. You might have an old box, a simple tray, or even just a picture frame that could use a touch of something different. With just a few basic items and a little bit of time, you can give these items a whole new lease on life, transforming them into something truly one-of-a-kind. It's a surprisingly straightforward way to get creative, too it's almost like magic.
We're going to go over the simple methods, talk about the stuff you’ll need, and even show you some easy things you can make right away. This approach is a great way to bring your own flair to things you use every day, or to create thoughtful gifts for people you care about. So, get ready to discover how simple it can be to start your own creative projects with this neat papercraft idea, you know?
What is Decoupage Decoupage Anyway?
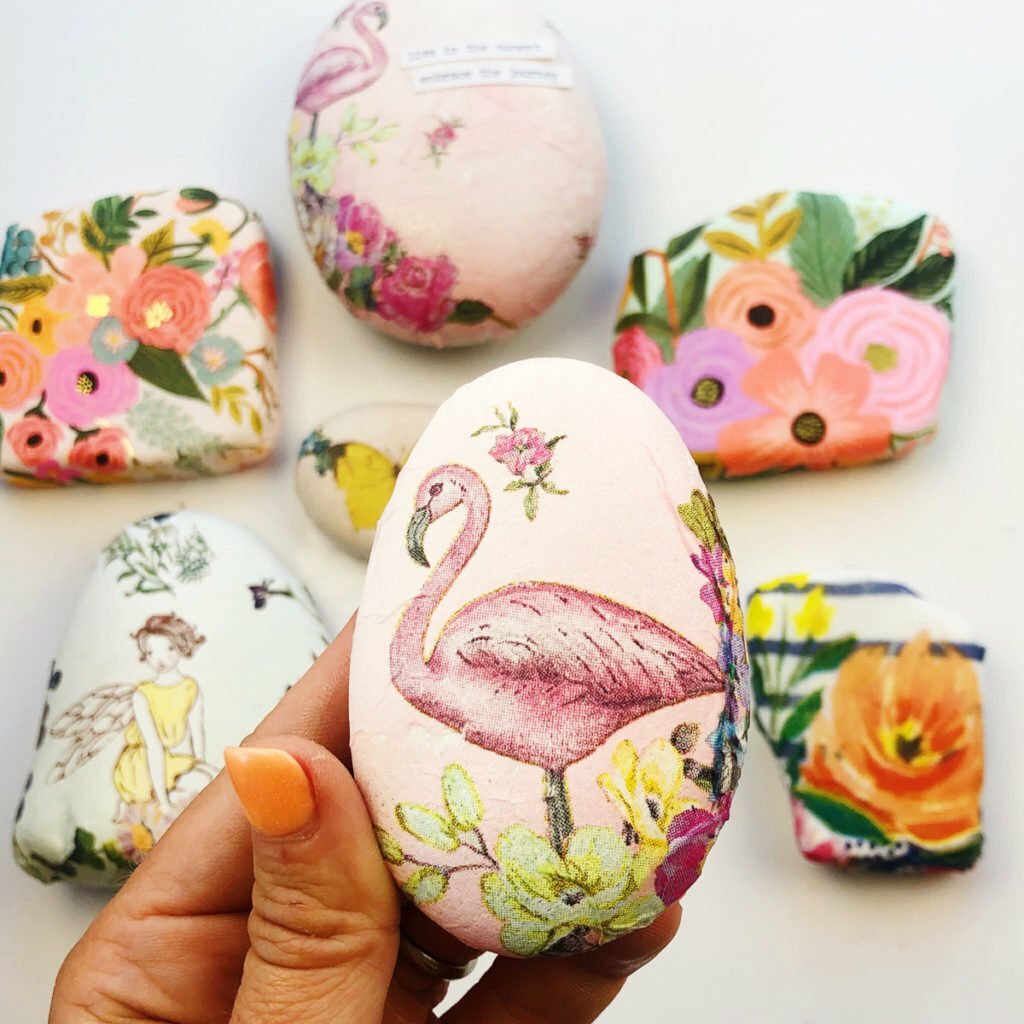
So, what exactly is this thing called decoupage? At its heart, it’s a method for decorating an item by sticking down colorful paper shapes onto its outside. You combine these paper cutouts with special paint looks, maybe some gold leaf, and other decorative bits. The idea is to make the paper bits look like they are part of the object itself, not just stuck on top. It's a way of making something plain into something quite beautiful, actually.
You take thin pieces of paper, or even cloth, cut them into the shapes you want, and then you use a special kind of glue to attach them to whatever you are decorating. After they are stuck down, you put on several layers of a clear coating, like a varnish, to keep everything safe and give it a smooth, finished feel. This method helps the paper bits blend in, making them appear as if they were painted onto the item, in a way. It’s a very old art, with a long history of people making things look special.
This approach allows you to turn items you see every day around your place into personalized pieces of art. You can begin with some straightforward guides that show you how to make six easy things right now. You’ll find out about the story behind this craft, how to do it, the things you’ll need, and a lot more. It’s a pretty neat way to make things your own, you know, adding your personal touch to things you use or see regularly.
Getting Started with Decoupage Decoupage - What You Need
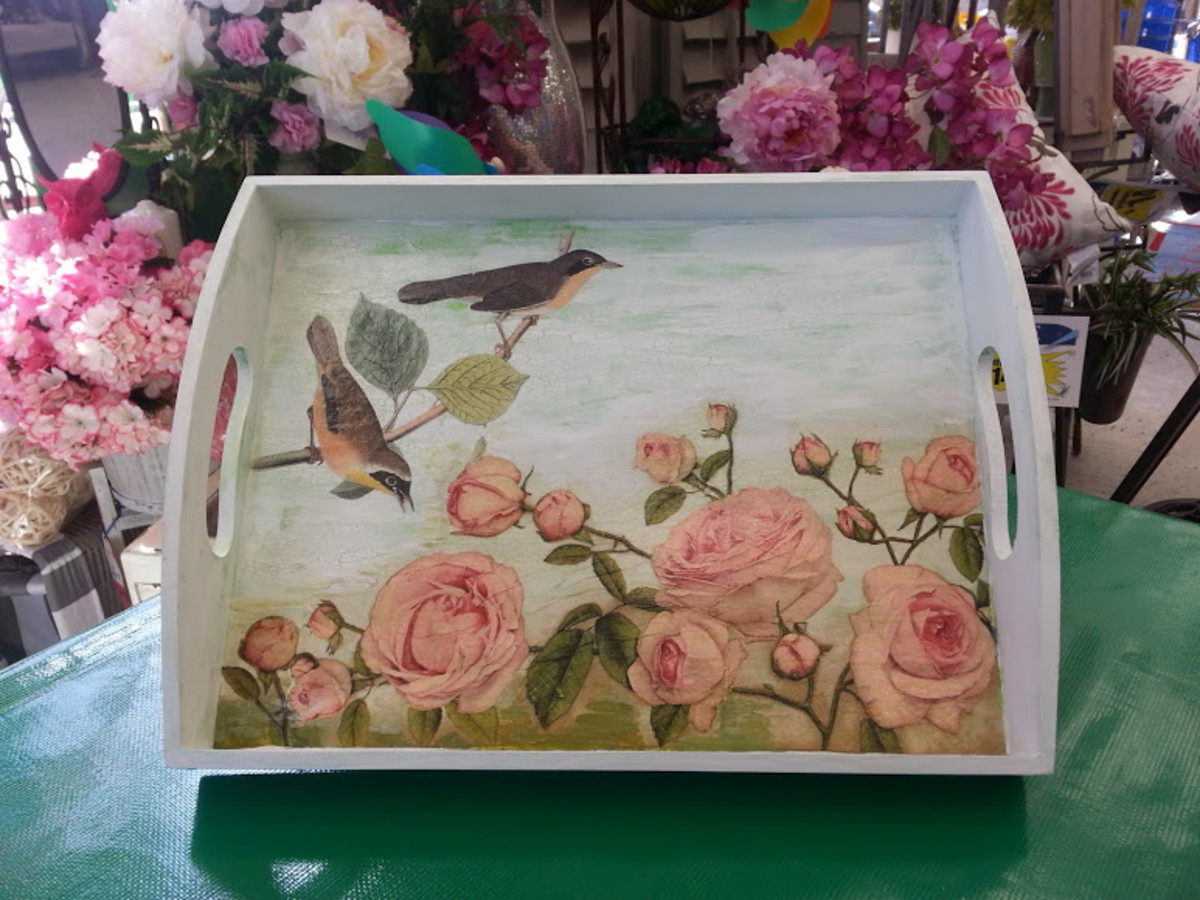
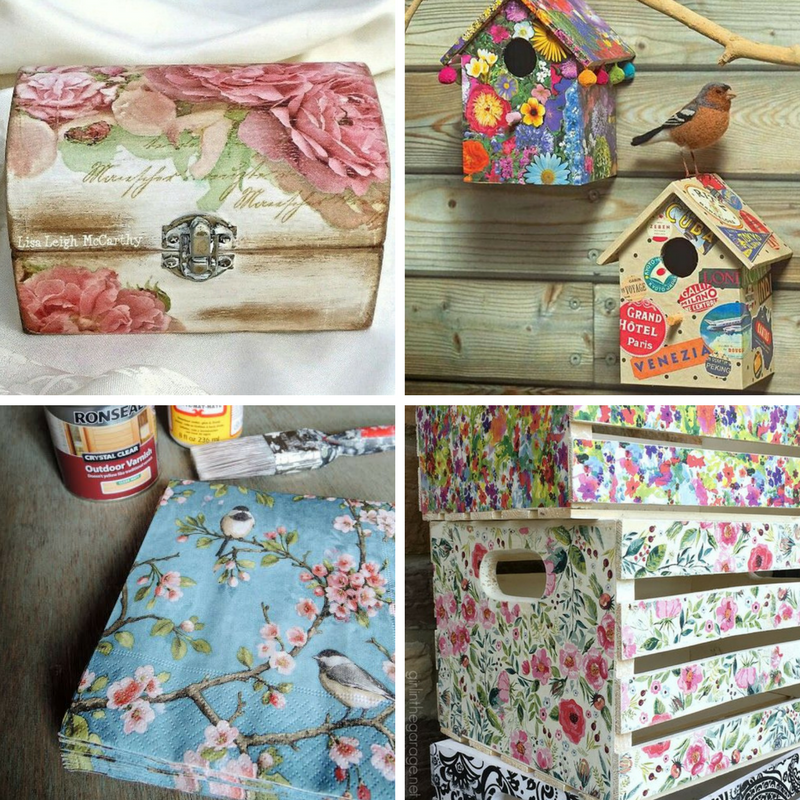
To begin with decoupage, you don't need a huge amount of specialized gear, which is pretty good. The basic idea involves a few simple things: something to decorate, some paper or fabric bits, a type of glue, and a way to protect the finished piece. Think about starting with things like old wooden boxes, plain picture frames, or even glass bottles. These are nice because they give you a flat or mostly flat area to work on, making it easier for a first try, frankly.
For the paper elements, you can use all sorts of things. Special decoupage paper is available, which is usually quite thin, but you can also use paper napkins, magazine clippings, old book pages, or even printed photos. The thinner the paper, the easier it often is to get a smooth finish without a lot of bumps. Rice paper is another good choice, as it's very thin and tends to blend in well. You want bits of paper that you like the look of, something that speaks to you, as a matter of fact.
Then there's the sticky stuff, the glue. This is often a special kind of medium that does double duty as both an adhesive and a clear coat. You'll also want some brushes to put the glue on, maybe a small detail brush for tiny areas and a wider, flatter brush for bigger spots. And to keep your hands clean, some paper towels are always helpful. That’s pretty much the main stuff you'll need to get going with your decoupage decoupage projects, more or less.
How Do You Actually Do Decoupage Decoupage?
So, you have your item, your paper bits, and your glue. What's the next step, how do you actually start sticking things down and making them look good? It’s a series of fairly simple actions, and once you get the hang of it, it becomes quite natural. The main thing is to work in layers and be patient with each step. You’re building up a design, piece by piece, you know.
First, you want to get your item ready. This might mean cleaning it off, making sure it’s free of dust or dirt. If it’s a wooden piece, you might want to give it a light sanding to make the surface nice and smooth for the paper to stick to. A smooth start makes for a smooth finish, usually. Then, you prepare your paper bits. This means cutting or tearing them into the shapes and sizes you want. Some people prefer tearing for a softer edge, while others like crisp, cut lines. It’s really up to what look you are going for, apparently.
Next comes the actual sticking part. You put a thin layer of your special glue onto the item where you want to place your paper piece. Then, you gently put the paper bit onto the glue. Once it’s down, you put another thin layer of glue right over the top of the paper, smoothing it out from the middle outwards to get rid of any air bubbles or bumps. You do this for each paper piece, letting each layer dry a bit before adding more. This layering is what makes the decoupage decoupage look so polished, in a way.
Simple Steps for Your First Decoupage Decoupage Project
Let's walk through a very basic way to get your first decoupage project done. Imagine you have a plain little wooden box you want to make pretty. You've picked out some nice paper napkins with a pattern you like. These are often very thin, which is good for starting out. First, you'll want to separate the printed layer of the napkin from any plain layers underneath. Napkins usually have two or three layers, and you only need the top one, that’s just how they work.
Now, get your foam brush ready by soaking it in clean water for a moment, then squeeze out the extra water until it feels just a little bit damp. This helps the brush spread the glue smoothly. Then, put a thin but complete coating of your glue onto a part of the box, covering an area about the same size as the napkin piece you're about to put down. You want enough glue to keep the napkin from getting wrinkly or drying out too fast. It’s a balance, really.
Gently place your napkin piece (printed side facing up, of course) onto the wet glue. With your fingertips, or a soft brush, very carefully smooth out any folds or air pockets. Work from the middle of the napkin outwards. The goal is to get it as flat and smooth as possible. Once that piece is down, let it dry a bit before adding more. You can keep adding pieces, overlapping them if you like, until your box is covered. After all the paper is down and dry, you'll put on a few more clear coats of the glue over the whole thing to protect it and give it a nice, even finish. This makes your decoupage decoupage creation last, you know.
Is Mod Podge the Only Way for Decoupage Decoupage?
When people talk about decoupage, the name Mod Podge comes up a lot, and it's a very popular product, but is it the only thing you can use? The simple answer is no, it’s not the only option out there, though it is quite famous for a good reason. Mod Podge is actually a brand name for a type of decoupage glue, made by a company called Plaid Enterprises. It’s also often called decoupage medium, which is a more general term for this kind of product, you see.
There are several different companies that make decoupage mediums, and within each brand, you’ll typically find various types or formulas. Some are made for outdoor use, some for a shiny finish, others for a matte look, and some even have special properties like being extra strong. So, while Mod Podge is a really good choice and widely available, you do have other options if you look around. It’s like how there are many brands of sticky tape, but "Scotch tape" is often used to mean any clear tape, pretty much.
Mod Podge is very well-known for decoupage projects, and it's often said to be one of the best glues for this craft. But, it’s actually quite versatile and can be used for other things too. It works as an adhesive to stick things together, and also as a protective sealer for all sorts of craft projects. This includes working with fabrics, wood, tile, and even clay. So, it's a handy item to have in your craft supplies, even if you’re not doing decoupage decoupage, in some respects.
Different Kinds of Decoupage Decoupage Mediums
Since there are many different types of decoupage mediums, it’s worth knowing a little about them, especially if you have a specific project in mind. For example, if you're working on something that will be in a spot exposed to dampness, like in a washroom or as a kitchen backsplash, you might wonder what kind of Mod Podge or similar product would be best. In that case, using a "hard coat" formula is a good idea, and then putting another clear protector over it for extra safety. You just wouldn't want to use a spray-on protector indoors, usually, as the fumes can be strong.
People also sometimes ask if there's such a thing as colored Mod Podge. And yes, in that line of thinking, there are many different kinds of Mod Podge that you can easily get, made to fit a whole bunch of different needs. Some might have a bit of glitter, or give a frosted look, or even have a tint to them. So, if you're hoping for a specific effect or color, there's a good chance there's a version of decoupage medium that can help you get it, you know.
For over fifty years, Mod Podge has been helping people who like to craft and do-it-yourself by giving them good sticky stuff and clear finishes to turn regular items into something special. They really do believe that being creative makes life better, which is a nice thought. So, whether you're looking for something that dries quickly, or something that gives a super shiny finish, or something that can stand up to a bit of water, there’s likely a decoupage decoupage product out there that fits the bill, pretty much.
Why Do Wrinkles Happen in Decoupage Decoupage?
One of the most common little troubles for people just starting out with decoupage, especially when using Mod Podge, is getting wrinkles in their paper. You put the paper down, smooth it out, and then as it dries, little folds or creases appear. It can be a bit frustrating when you’re trying to make something look nice and smooth. But don't worry, it's a very common thing, and there are ways to keep it from happening, thankfully.
Wrinkles often happen because of how the paper reacts to the wet glue. Thin papers, like napkins or tissue paper, are very prone to this because they absorb the moisture quickly and can stretch or buckle. If you don't use enough glue, or if you don't smooth the paper down evenly, air can get trapped underneath, or parts of the paper can dry faster than others, causing those unwanted folds. It’s a bit like trying to put a sticker on something and getting a bubble underneath, basically.
Another reason for wrinkles can be putting too much glue on the top layer, or not letting the layers dry enough between coats. When you put on too much glue, it can make the paper too wet and stretchy, making it harder to keep flat. And if you rush the drying process, the paper might not have fully settled into place before you add more moisture, leading to new folds. So, patience is a big part of getting a smooth decoupage decoupage finish, as a matter of fact.
Fixing Common Decoupage Decoupage Glitches
If you follow some simple suggestions, you can mostly avoid those annoying wrinkles and have a good time with your decoupage projects. The main thing is to prepare your surface well, use the right amount of glue, and be gentle when putting down your paper. We promise that if you stick to these ways of doing things, you will have good luck and be a very pleased decoupage artist. You just need to gather your glue and paper, and you’re almost there.
When you're putting down a piece of paper, especially a thin one like a napkin, use a small, soft brush to spread the glue. You want to make sure the glue goes all the way to the edges of where your paper will sit. Once the paper is gently placed, use your fingertips, or a soft roller if you have one, to smooth out any folds. Work from the middle of the paper out to its edges. This pushes out any trapped air and helps the paper lie flat. It’s a bit like ironing, but with glue, you know?
Also, it's very important to use enough glue on the surface before you put the paper down. If there isn't enough glue, parts of the paper might dry too quickly or not stick properly, which can also lead to wrinkles. You want a thin but full layer of glue. And remember to let each layer of glue dry before you add another one, especially the final protective coats. This patience helps everything set properly and gives you that smooth, professional-looking decoupage decoupage finish. It really does make a difference, honestly.
Beyond Flat Surfaces - Exploring Decoupage Decoupage Styles
While many people start with flat items like boxes or trays, the art of decoupage isn't just for flat surfaces. You can actually use this method to decorate all sorts of things, from curved bottles to oddly shaped sculptures. The key is to find flexible paper or fabric that can bend and conform to the shape of your item. This opens up a whole world of creative possibilities, letting you make pretty much anything into a piece of art, that’s quite true.
You can use special craft papers, rice paper, or even paper napkins for your designs. These are often preferred because they are thin and easy to work with on different shapes. Some folks also use scrapbook paper, which is a bit thicker, but can still work if you're careful. And there are even rub-on transfers for furniture, which are a bit like decoupage but without the wet glue step. These different materials let you create all sorts of looks, from old-fashioned to very modern, basically.
These pretty craft papers are great for all sorts of artistic activities, not just decoupage. They work well with Mod Podge, for do-it-yourself projects, for scrapbooking, for mixed media art, for junk journaling, for art journaling, for making cards, and for collages. So, if you get some nice paper, you'll find it has many uses beyond just sticking it down. It’s a versatile material for anyone who enjoys making things, more or less.
Pyramid Decoupage Decoupage - Adding Depth
There's a really interesting type of decoupage that adds a whole new dimension to your projects, quite literally. It’s called pyramid decoupage, and sometimes people call it pyramage. This is a bit like 3D decoupage, but it creates a specific kind of layered look. Instead of just sticking flat pieces, you build up a shape that looks like a pyramid, giving your artwork depth and a cool visual effect, you know.
In pyramid decoupage, you start with several identical pictures. You then cut each picture into shapes that are progressively smaller, but still the same overall shape. So, you might have a big square, then a slightly smaller square, then an even smaller square, all from the same image. Then, you layer these cut-out shapes on top of each other, using small foam spacers that have adhesive on them. These spacers lift each layer up a bit, creating a stepped, three-dimensional effect that looks like a pyramid. It’s a very clever way to make an image pop out, honestly.
This method turns a flat picture into something that has real presence and visual interest. It’s a bit more involved than basic decoupage, as it requires precise cutting and careful layering, but the result is quite striking. A person who does decoupage, whether it’s the flat kind or the pyramid kind, is sometimes called a decoupeur, or simply a cutter. It’s a fun way to explore the art of decoupage decoupage beyond just flat surfaces and add a new level of creativity to your projects, as a matter of fact.
This guide has walked through the simple yet rewarding world of decoupage, from understanding its core idea to getting started with basic supplies and easy projects. We've looked at how Mod Podge fits into the picture, along with other types of glues, and how to keep those pesky wrinkles from showing up. We also touched on different styles, like pyramid decoupage, that add depth to your creations. The aim was to give you a good start on turning everyday items into personalized works of art, using paper or fabric bits and a bit of glue.
Mastering the Basics of Decoupage: Tips and Tricks for Decoupaging
What Is Decoupage? - Decoupage Arts & Crafts Ideas & Tutorials - HubPages
Beginner’s guide to decoupage — trendiest paper craft of all time!!
